
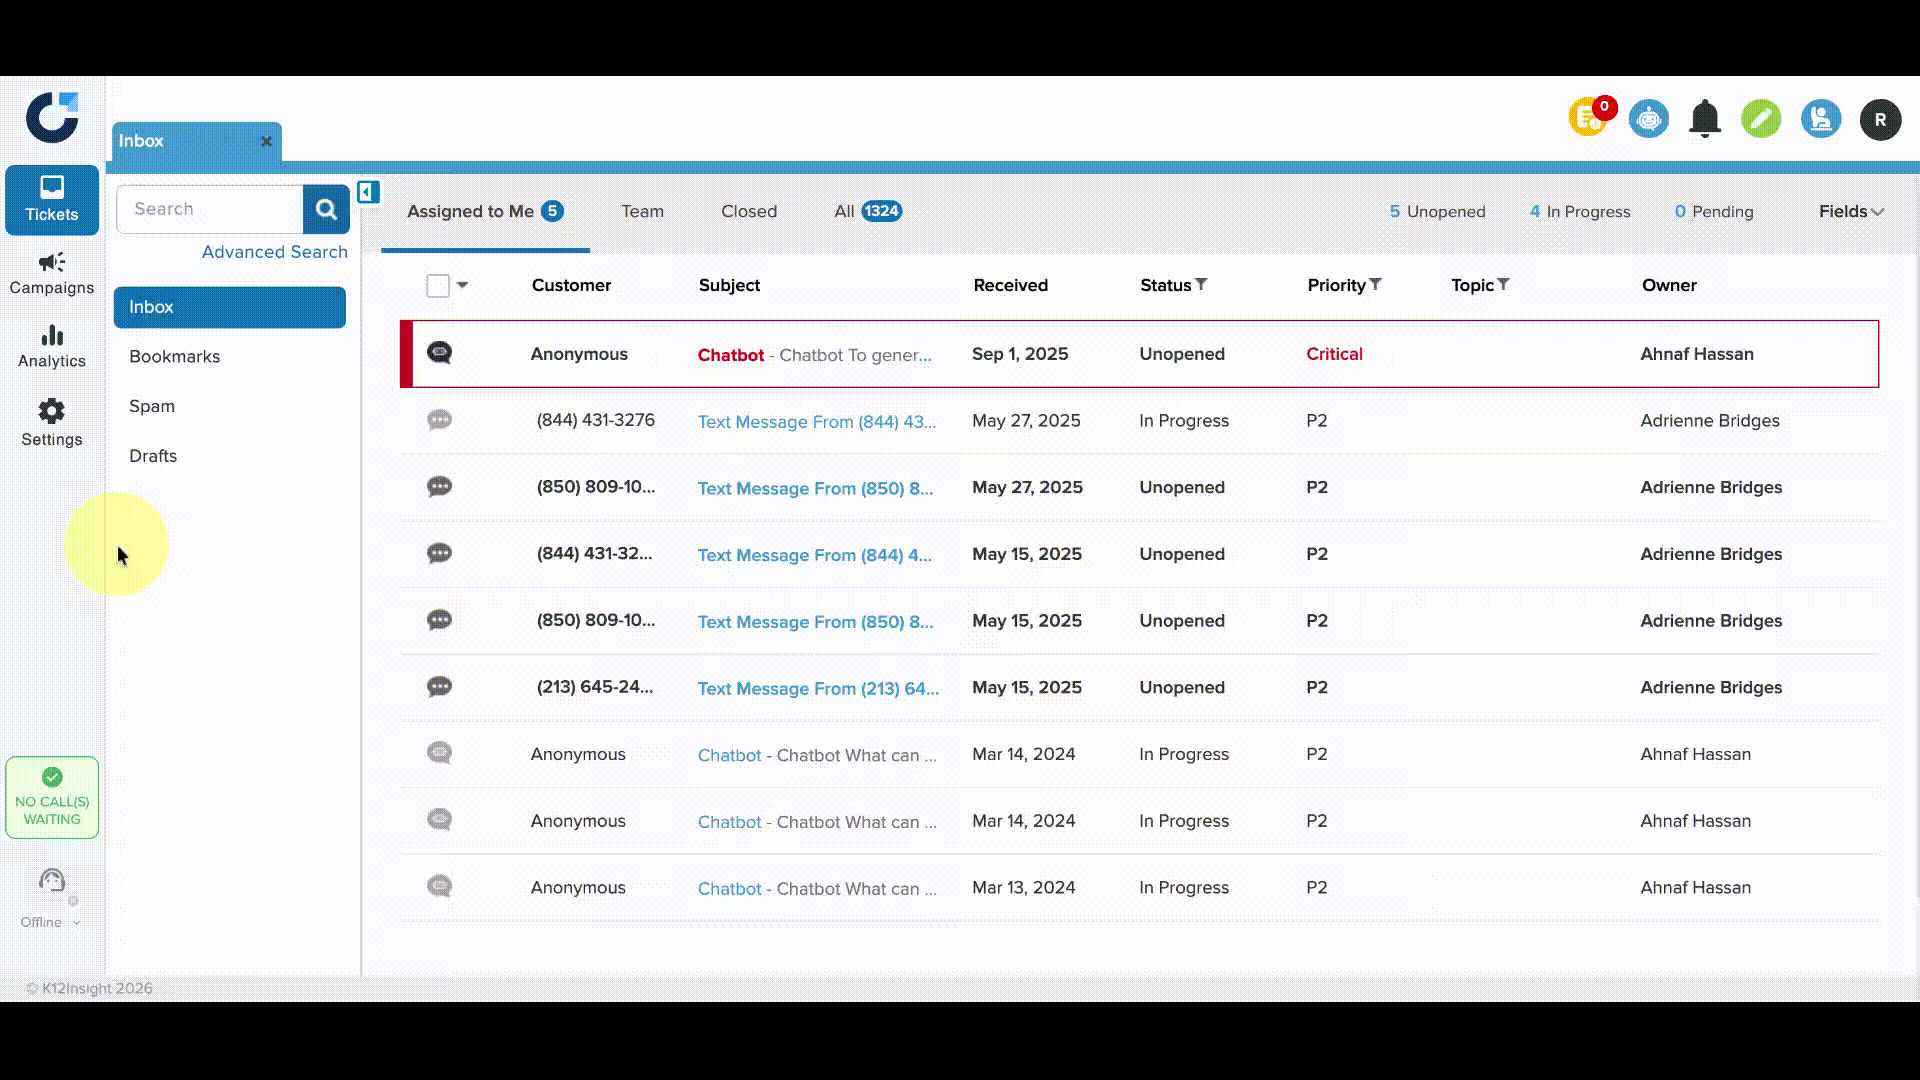
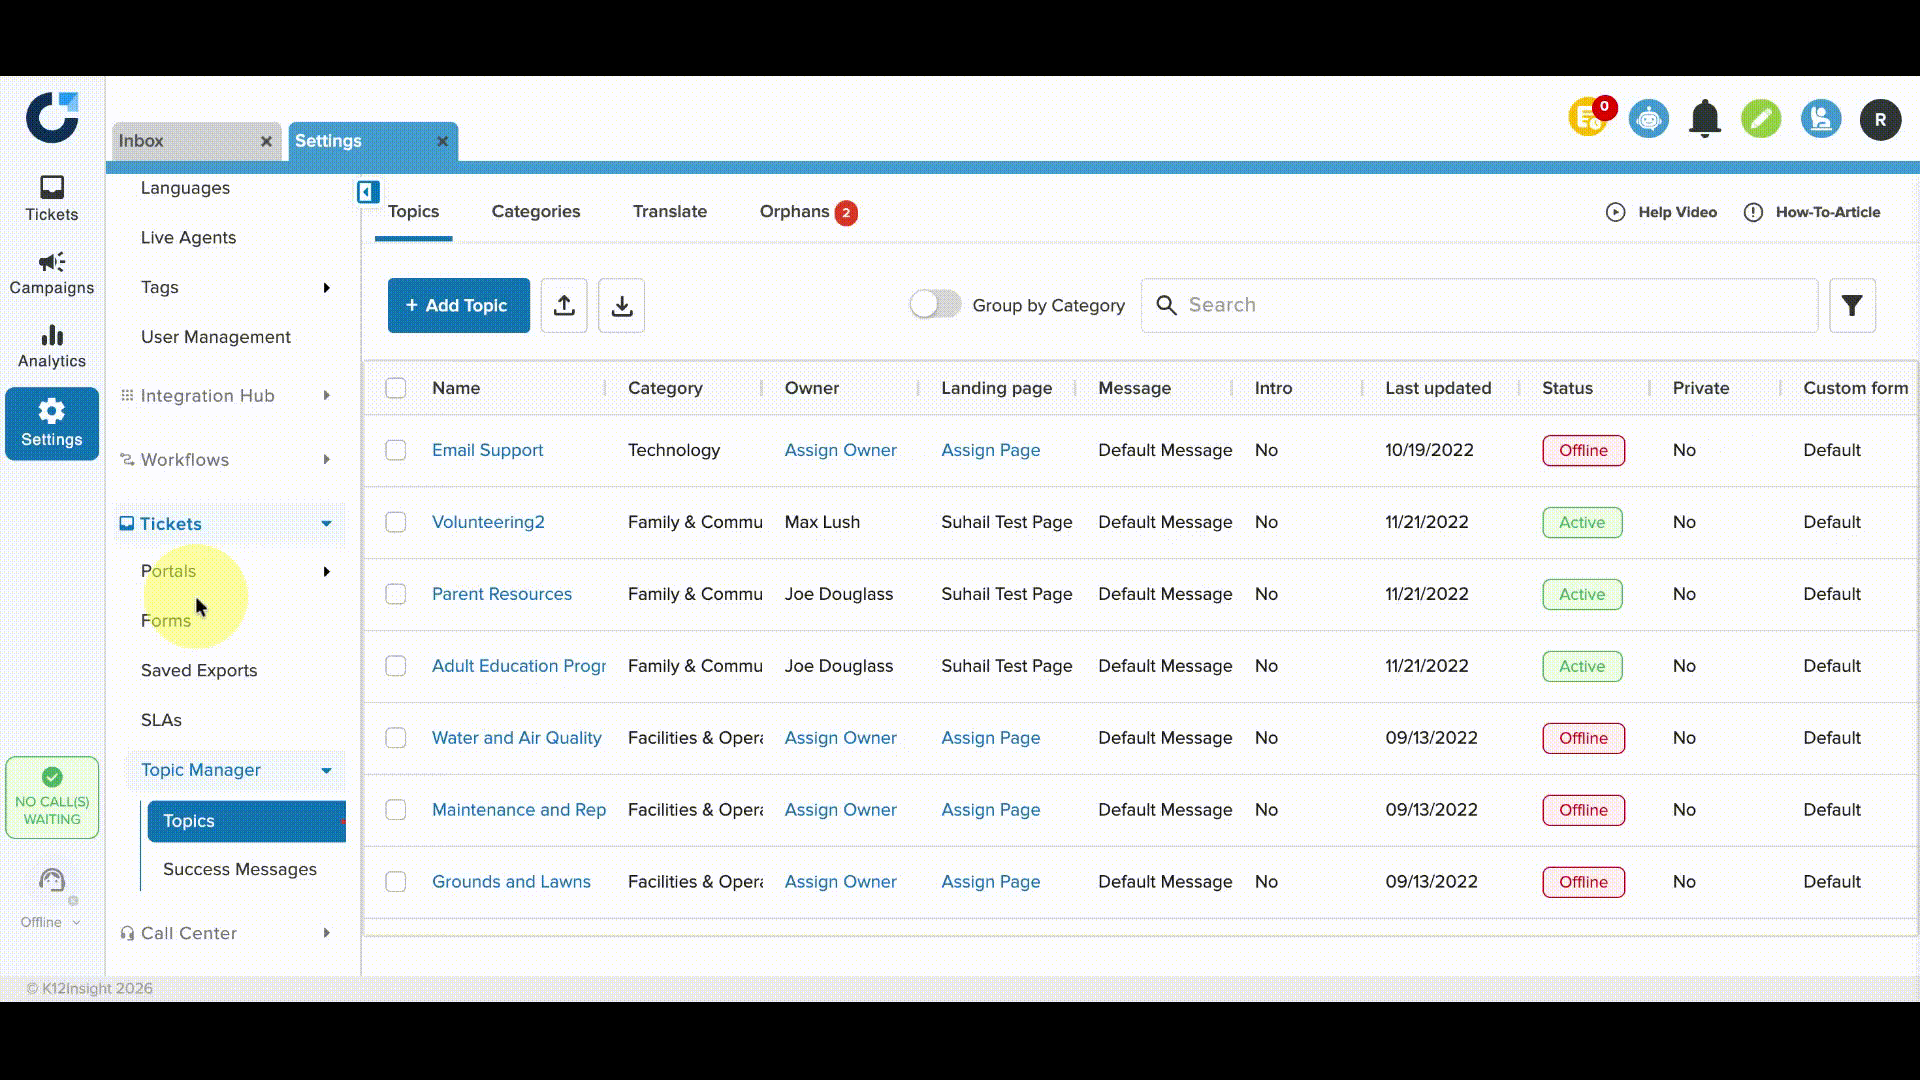
The Topics Manager is organized in a table view, giving users quick access to important information about each topic, including ownership, usage, last update, and status. With this clear and concise layout, teams can efficiently navigate and manage topics, ensuring no important details are overlooked.
Setting Up Topics and Categories
Navigate to Settings. Then click Tickets, then Topic Manager, then Topics. At the top of the page are tabs for Topics and Categories. Districts can customize and organize Onflo pages so customers can easily find the topic or issue about which they intend to submit feedback.
Topics
Topics are areas of interest where a district is seeking feedback. Customers will submit a ticket by selecting the button that best describes their needs. Topics may be specific departments such as Transportation or Human Resources, or they may be specific to schools, or address other important district topics.
From the Topics page users can choose to toggle on Group by Category to see all topics grouped together by their respective categories.
Categories
Topics are organized into groups called Categories on the Onflo landing pages. Examples of Categories are Elementary Schools, Central Office Departments, and Transportation. Users can toggle on the Group by Category option to organize Topics together by Category.
Adding Categories
- From Settings click the Topics page under Topics Manager, select Categories, then click Add Category.
- Type the name of the category to be created (e.g., Central Office, High Schools, State Policies, etc.).
- Select which user should be a Category Administrator.
- Choose which Landing Page the category should be found on.
- Users can also make the category private by checking the Make Category Private box. Topics in Private Categories cannot be accessed by anyone other than the Category Administrator and the respective Topic Owners.
Editing Categories
- To edit an existing category, check the box to the left of its name and click Edit Category.
Adding Topics
- From Settings click the Topics page under Topic Manager, click on Topics at the top of the page.
- Click on the blue Add Topic button.
- Next, assign a name, category, owner, team member(s), and success messages.
Pro tip: Taking a minute to add an optional introduction for your topic will save time in the long run. Add a welcoming introduction message, and use this space to provide guidance related to frequently requested information and resources.
- Click Save & Close, or Save & Add Another if you have a list of topics to add at once.
Importing & Exporting Topics
Multiple topics can be created more quickly by importing them.
- To Import: Click on the up arrow next to Add Topics, and then follow the instructions to download the template.
- Enter the data into the template in the proper columns, save, and upload the file.
- To Export: Click on the down arrow and select the categories or topics to export, then click Download.
Editing Topics
For System Administrators:
Navigate to the Topic Manager and select or search for the topic to be edited. Click on the topic name to open the editor. The name of the topic, owners, team members, category, landing page, and even the messaging a customer sees when they choose this topic can be edited. Click Save to save changes.
Bulk Edit Topics
To make changes to multiple topics at once, check the box to the left of two or more topics, then click Bulk Edit, and choose from the following options:
- Change Category Administrator
- Change Topic Owner
- Change Team Member
- Change Landing Page
- Change Message
- Change Status of Topics
- Create Copy
- Change Visibility
- Move to a Category
Archive Topics
Check the box to the left of the Topic(s) to be archived and click the Bulk Edit dropdown. Select Change Status, then Archived, then Save.
Editing Categories
To edit a category, navigate to the Categories page from the Topic Manager. Check the box to the left of the category name, then select Edit Category. The category name, administrator, and landing page can be edited. The category can also be made private. Note that from the Categories page users can also select a category and click the Edit button to change a category's owner, visibility, and department.
Delete: Check the box to the left of the Category(ies) to be deleted, then select Delete.
Note: A Category cannot be archived if it contains assigned topics. The assigned Topics must first be removed before archiving the Category.
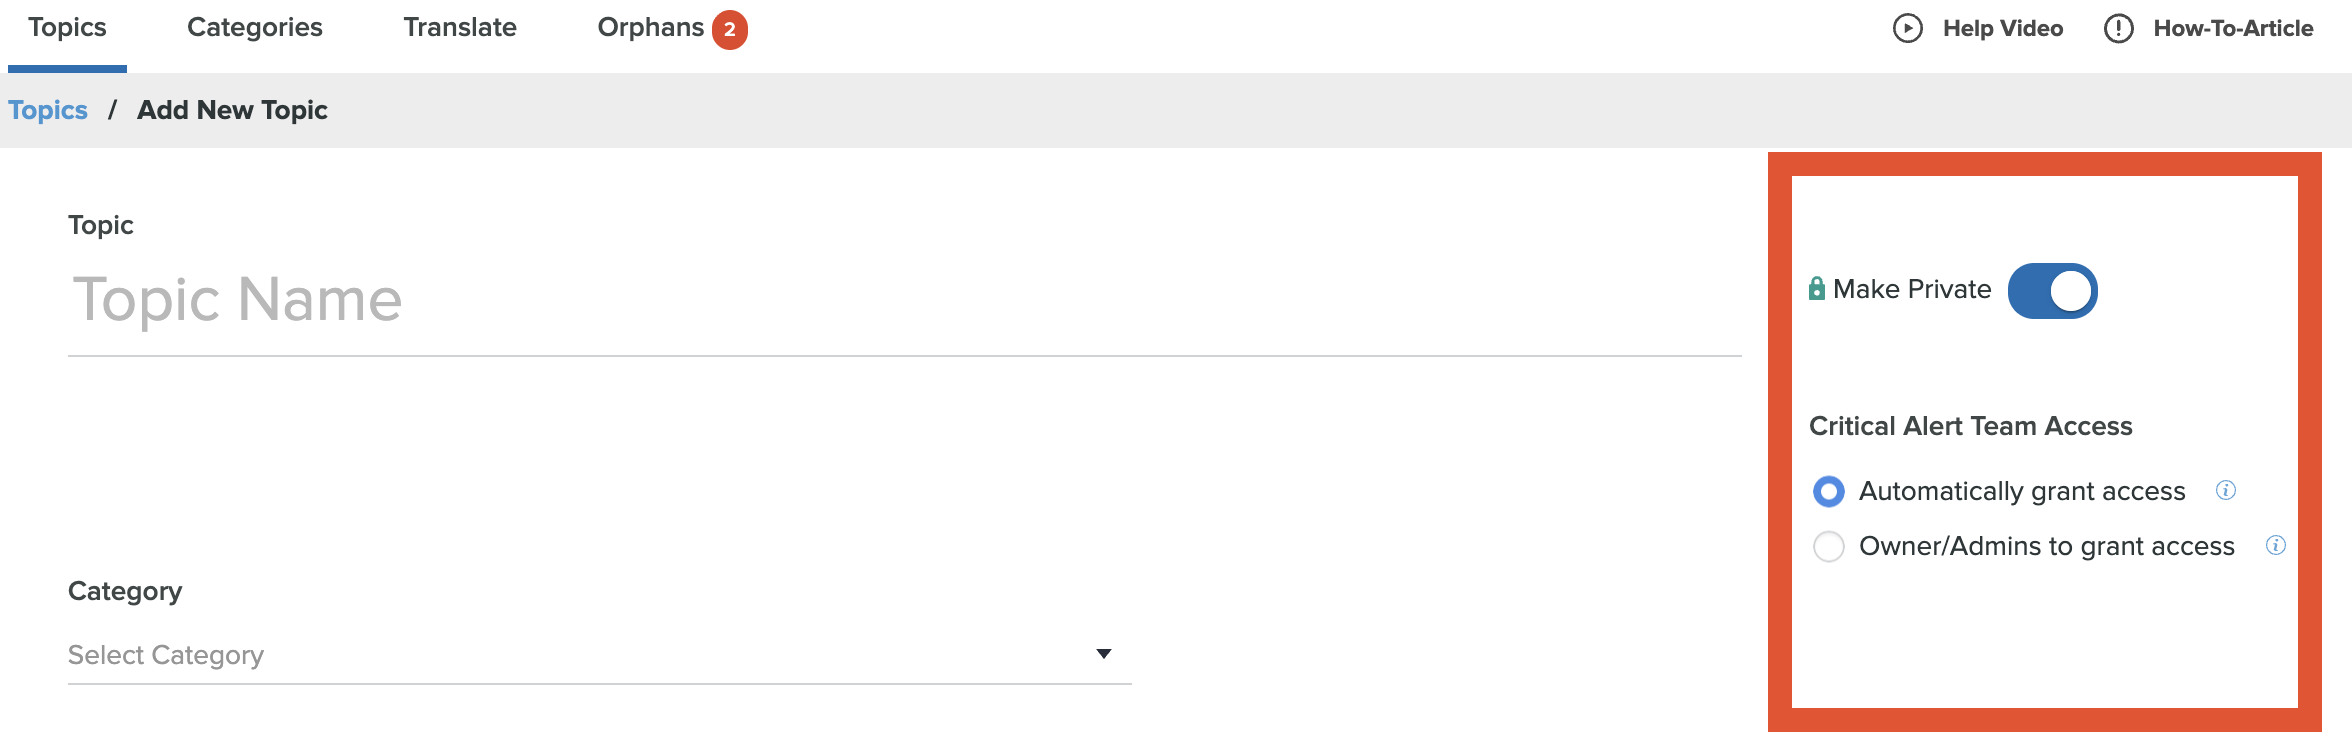
Marking a Category or Topic Private
Activating this feature will keep ticket access restricted certain users. When creating a category or topic choose from the following options for access:
- Automatically grant access: All the critical tickets in this category/topic will be accessible by the critical alerts team automatically based on the keywords set in the critical alerts settings.
- Owner/Admins to grant access: Topic owners, category admins, and system admins will be asked on the ticket page to grant the critical alerts team access to critical tickets on this topic, based on the keywords set in the critical alerts settings.
Translate Topics
The translate feature is integrated within Topics Manager, which makes it easier to manage content in multiple languages. All translation interfaces now offer auto-translation capabilities, allowing users to translate content with the click of a button.
Within the Topic Manager, click the Translate tab. Then select a language from the dropdown and either add the translation manually or use the Auto-Translation feature. Save as Draft or Publish the updates.
For Topic Owners
Topic owners have the ability to edit team members. This option is available under Settings under User Management.
From the Users page, you’ll see a complete list of those who currently have access to the Topics you own. Remember, System Administrators and Global Users have access to all opics, so they are automatically included on the list.
To edit a user, click on their name or check the box next to their name and click Edit User. To add new users, click Add New Users.