Overview
Onflo allows you to create and assign tasks in tickets. This helps teams collaborate across departments by keeping all related actions and approvals within a single ticket. Each task can include a name, description, and owner, allowing you to clearly define responsibilities and ensure nothing is missed.
Task Types
There are two types of tasks you can add to a ticket in Onflo: Normal Tasks and Approval Tasks.
Normal Tasks
Normal Tasks are used to track actions or responsibilities related to a ticket. These can be assigned to any user or group within your organization.
Use Normal Tasks for:
- Gathering additional information or documentation
- Assigning follow-up actions to other users
- Coordinating tasks between departments
Once a Normal Task is completed, the assignee can mark it as Complete, and the update will appear in the ticket’s task list.
Approval Tasks
Approval Tasks are used when a specific person’s approval is required before a ticket can be submitted or processed.
Use Approval Tasks for:
- Procurement or purchasing approvals
- Budget or expense confirmations
- Department head or manager sign-offs
This ensures that all necessary authorizations are in place before work continues.
Adding Tasks to a Ticket
Creating Normal and Approval tasks is very similar. See below for directions for each type of task:
Normal Task
- Open the ticket you want to add a task to (for example, a Facilities request).
- Select Add Task from the ticket options.
- Enter the following details:
- Task Type - NormalEnter the following details:
- Name - A short, descriptive title
- Description - Optional details or context for the assignee
- Assign Task Owner – The user responsible for completing the task
- Due Date - When will this task be completed
- Status - Select one of the following:
4. Click Save to attach the task(s) to the ticket.

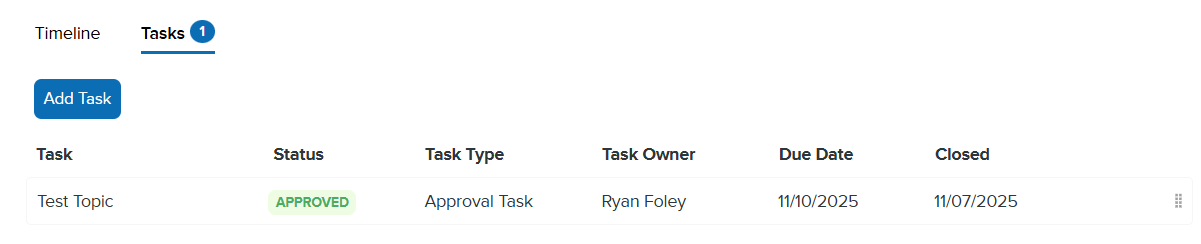
All tasks will appear in the Tasks section of the ticket, where you can track progress and view status updates.
Approval Tasks
- Open the ticket you want to add a task to (for example, a Facilities request).
- Select Add Task from the ticket options.
- Enter the following details:
- Task Type - Approval
- Name - A short, descriptive title
- Description - Optional details or context for the assignee.
- Assign Task Approver – The user responsible for approving the task.
- Due Date - When will this task be completed
- Status - Select one of the following:
- Pending Details
4. Click Save to attach the task(s) to the ticket.
The task status will be “Pending Approval” until the assigned approver reviews and approves the task.
Modify Tasks
Once tasks are generated, you can edit tasks by clicking Edit on the task line under the Tasks tab
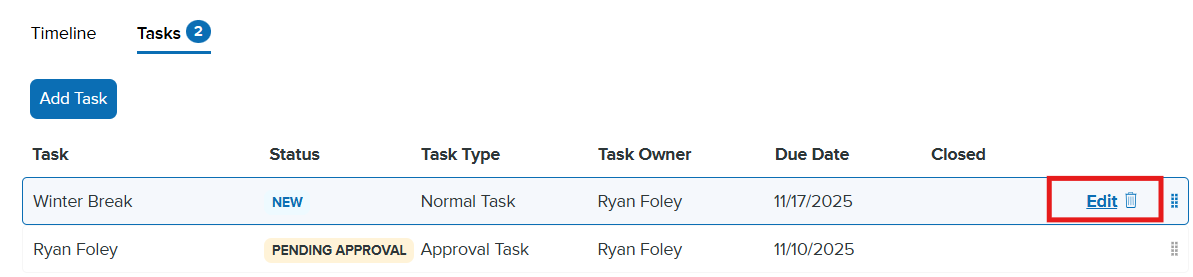
Edit Task
If you need to update information within a task, click Edit. This will allow you to access the form to modify the following fields:
- Task Name
- Task Description
- Task Owner
- Task Due Date
- Task Status
Close Task
To update the status of the ticket, click Edit. At the bottom of the form you can choose the Status under the drop-down menu, then click Save. To resolve a Normal task, select Close as the status.
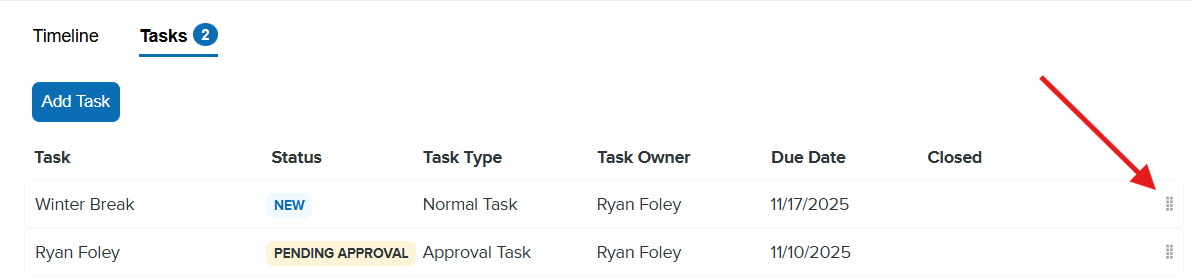
Edit View
If you have multiple tasks on a ticket you can re-order the tasks in the Tasks tab by grabbing the grid in the task line. This allows you to move the tasks to visually prioritize tasks.
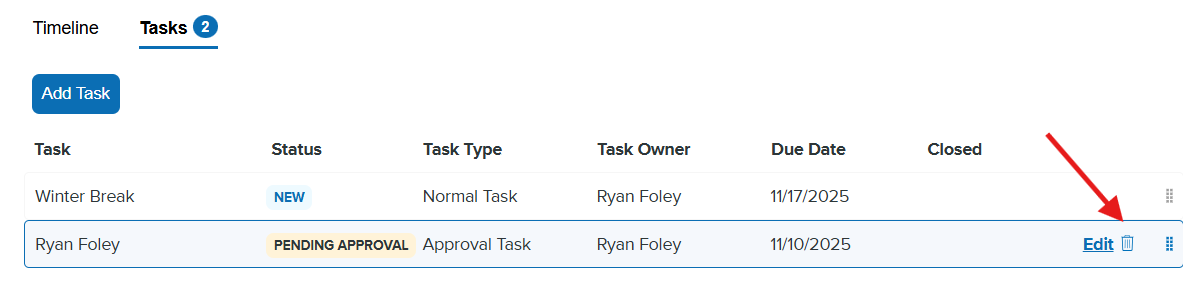
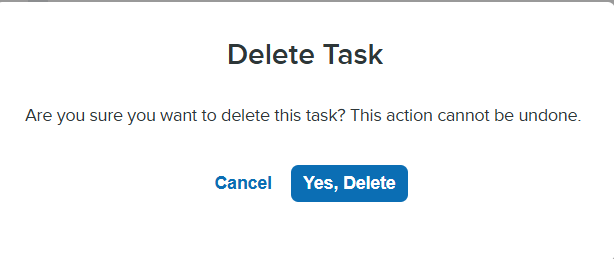
Delete Task
To remove a task, hover your cursor over the task, then click the trash can icon within the task. Onflo will prompt you to confirm your choice. Click Yes to delete the task, or Cancel to retain the task
Approval Tasks - Approving/Rejecting
When assigned an approval task, the Task Owner will do the following:
- Click the Approve or Reject button
- Leave any comments to accompany the approval/rejection (optional)
- Click Submit
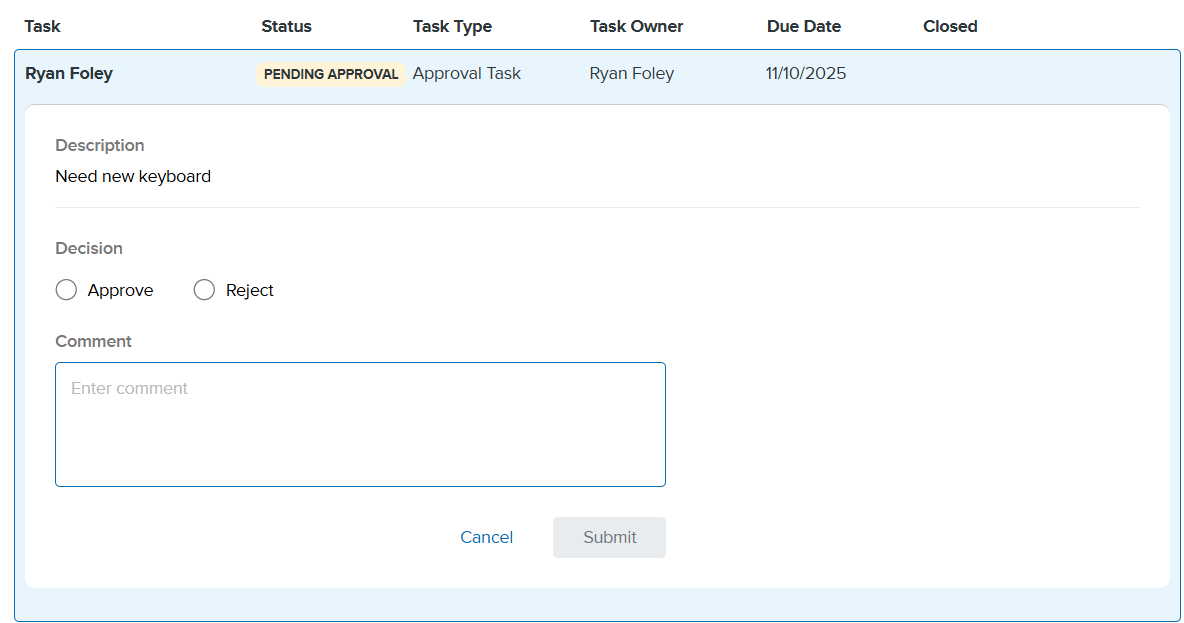
Once the task has been Approved or Rejected the status will be updated in the Tasks section of the ticket
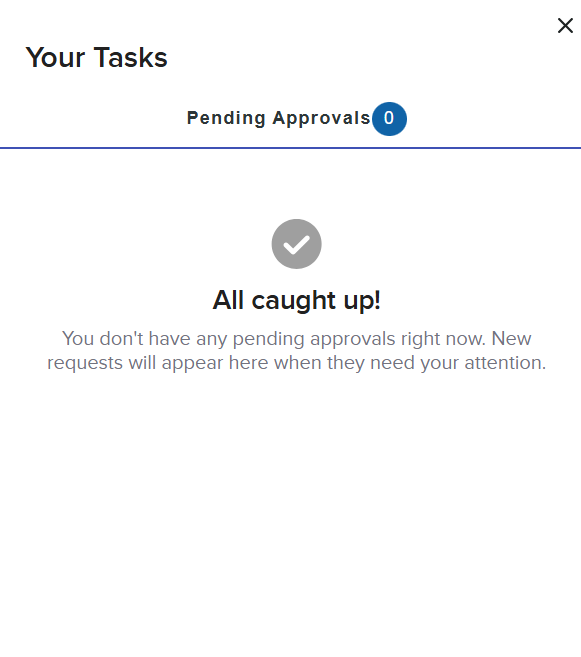
Viewing Your Tasks and Approvals
End users can now view all their assigned tasks and pending approvals directly in Onflo.
To view your tasks:
- Hover over the Tasks icon in the top-right corner of Onflo.
- A quick view will display:
- Your assigned tasks
- Any pending approvals awaiting your action
From this view, you can open the related ticket, review details, and complete or approve your tasks.