
If you've determined that you are the best person to respond to this Customer then follow the steps below to reply to the Customer.
- Click on the blue Reply to Customer link at the bottom right-hand corner of the original message
- If the text is grayed out, then check to see if the customer submitted the ticket anonymously, or did not give an email address as their contact information. Also check to see the status of the ticket, if the ticket is already Closed, then Reply to Customer will not be available.
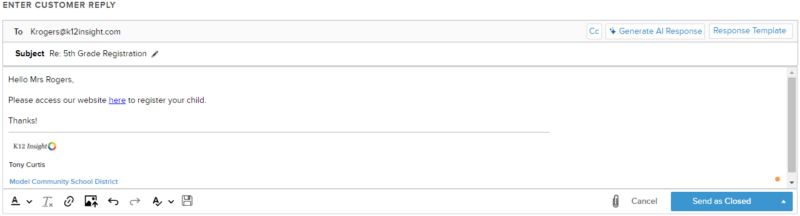
- By default, the subject line will appear as “Re: [original subject]”. This subject line is editable.
- Provide an original response by typing in the text box provided.
- Choose from a saved response by clicking on the menu titled Response Template in the top right corner of the text box.
- Tip: Use the search box to quickly find the right template for your response.
- If this menu does not appear, no Response Templates have been saved by your System Administrator or Topic Owner.
- Review the response and send.
- Click Send as Closed if a Customer response is not anticipated. This is the default setting for the Send button.
- When asking for clarifying or necessary information from a Customer, stop the clock while waiting for a response. Click on the triangle to the right of the Send button and select Send as Pending Details from the menu. Now, click the displayed Send as Pending Details button.
- To check in with a Customer while you and your district colleagues are working on following up, click on the triangle to the right of the Send button and select Send as In Progress from the menu. Now, click the displayed Send as In Progress button.
CC Emails: CC email addresses when sending customer replies
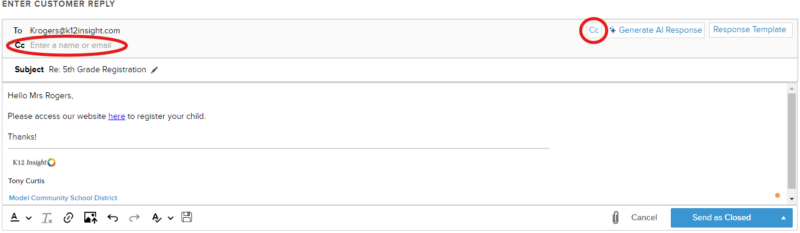
- Click on the CC button at the top right corner of the textbox
- The CC box will appear at the top of the reply
- Type in the email address(es) you want to CC
Attachments: Up to two attachments of up to 5MB each may be included with the reply to the Customer.
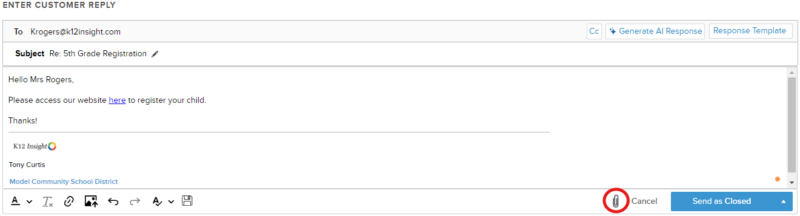
- Click on the paperclip icon to add a file OR
- Simply drag and drop files into the textbox to add
Save Draft and Response Templates
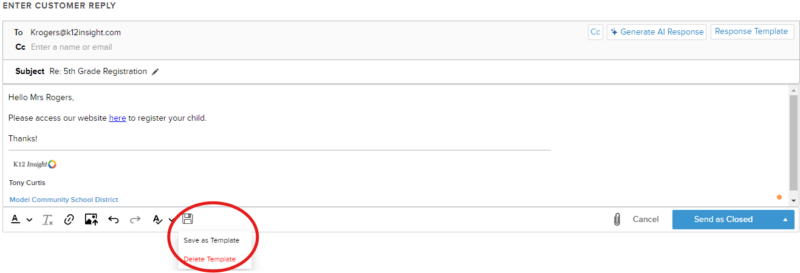
- Let's Talk! automatically saves your reply as a draft so none of your work will be lost if you leave the ticket, or log out of your account.
- You can delete the automatically saved draft by clicking on the floppy disk icon and select Delete Draft
- You can also save your response as a template for future use by clicking on the floppy disk icon then selecting Save as Template
Spell Check and Copy/Paste
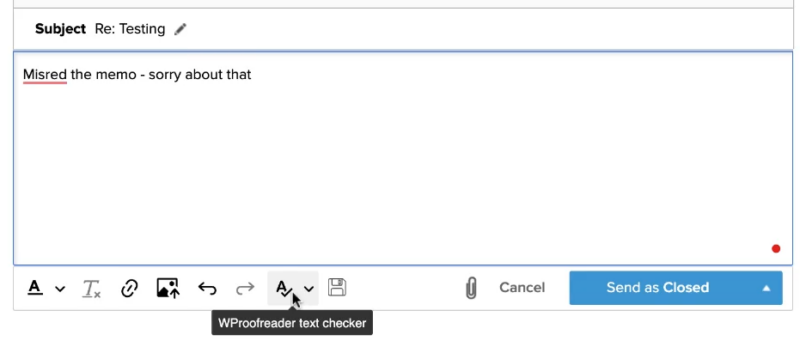
- If you misspell a word, you can click directly on the word to see corrected options or click on the spell check icon.
- You can also now copy and paste using right-click.