
Chatbot now offers the option to create school and/or department-specific versions which allows for more tailored and relevant responses.
Add a Profile
From the Settings page, click on Chatbot listed under the Channels section. You will see a Default Profile which lists all of the resources available.
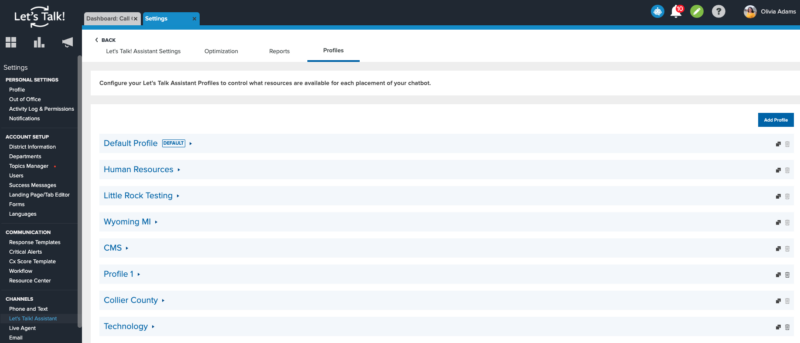
Click "Add Profile" > name your Profile then select the resources and Save.
Add Profile to a Landing Page
Once your Profile is built, you can add it to a Landing Page. Within Settings, select Landing Page/ Tab Editor listed under Account Setup.
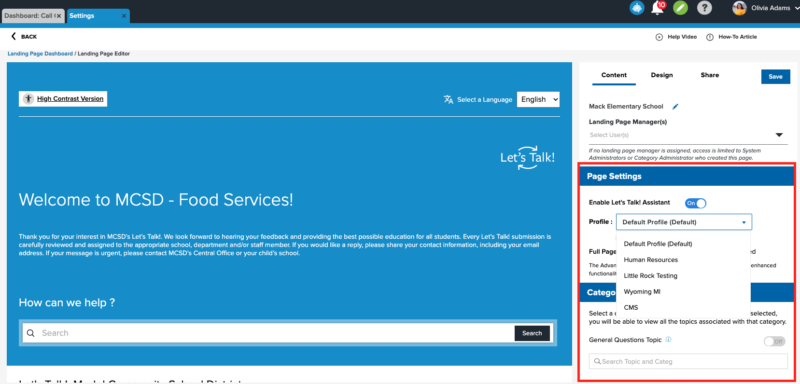
- Select your Landing Page.
- On the right side of the page under the Content tab, make sure the "Enable Chatbot" option is toggled on.
- You will see the Profile drop-down menu where you can select which profile appears on this Landing Page.
- Be sure to click the Save button up top.