
All email communications (replies to customers, forwarded tickets, email campaigns etc) sent out via Onflo (formerly Let’s Talk) are all sent out through the k12-lets-talk.com email domain.
If your district wants to use your own district domain to send out communications instead, you can do this by authenticating your domain.
If you plan to use the Campaign Manager feature, you should authenticate your domain prior to sending the first campaign.
Why set up DKIM?
Setting up DKIM will remove the "via k12-lets-talk.com" from emails and will allow you to have more attribution over the emails you send.
This helps reduce confusion for the end recipient who should focus on the company sending an email, not the client they are sending it through.
Why setup SPF?
Setting up the SPF record, allows you to send emails using your domain as a sender, even when the emails will be sent by our email servers.
Without the SPF record, the recipient email servers will mark your emails as a phishing attempt, as they would notice that the server the email is coming from (k12-lets-talk.com) is not allowed to send for your domain.
How do I do this?
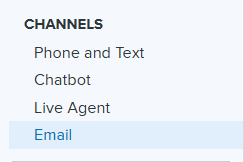
System Admins can access this feature by going to Settings > Channels > Email
Within the email settings page, scroll down to the bottom to find the Domain(s) authorized to be used as Sender Email Address section.

Type in the domain you want to authenticate - for example @mcsdistrict.org - and click Add.
A pop-up will appear with instructions. You have a couple of options to authenticate the domain:
- Create a TXT record with a DKIM value
- Create a TXT record with SPF value
- And if you have no idea what the two bullet points above mean, you can check the box at the bottom of the pop-up to send these instructions to your IT Admin.

Once the domain has been authenticated, you will find it under the Domain(s) authorized to be used as Sender Email Address section.
From there, you can change the sender address for any outbound emails to any email address from your district’s domain.
Outbound emails can be found under the following sections of Email setting:
- Ticket Replies Sent to Customers
- Email Notifications Sent to Customers
- Email Notifications Sent to Users
You can also update the Sender email address for Campaigns.