
Overview
Import your SIS data from Classlink via API.
Features
- Sync SIS users
Prerequisites
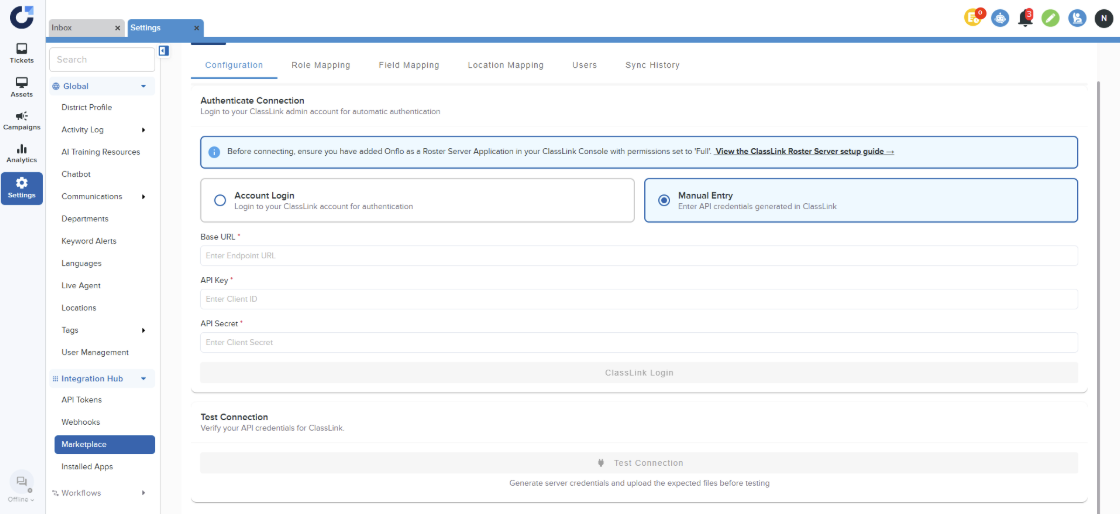
Before connecting, ensure you have added Onflo as a Roster Server Application in your ClassLink Console with permissions set to 'Full'.
- View the ClassLink Roster Server setup guide
Set-Up Instructions
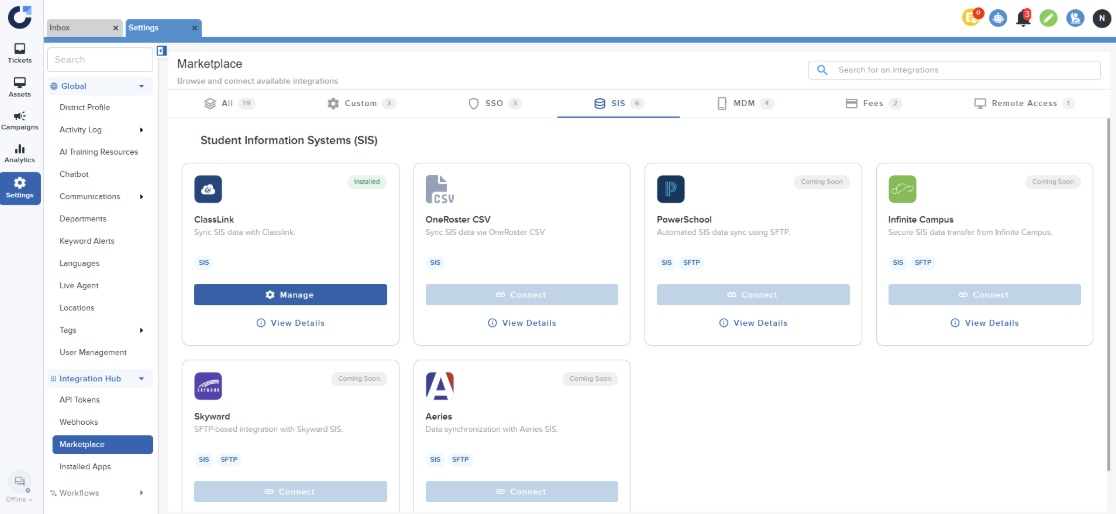
Step 1: Select the ClassLink SIS application in the SIS section of Integration Marketplace.
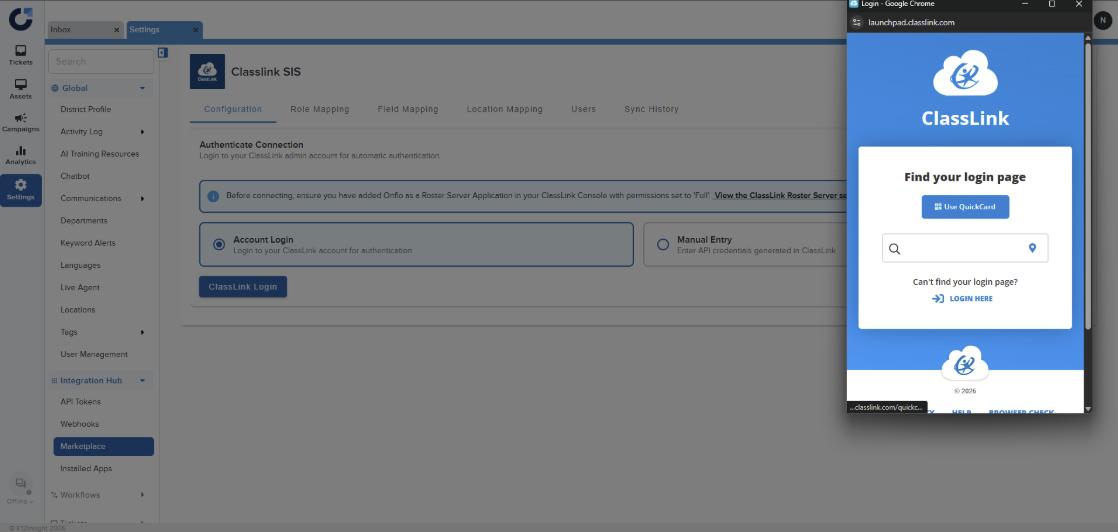
Step 2a: Click ClassLink Login and login to the roster server.
Step 2b: If Admins have the API credentials they can also authenticate via manually entering their credentials.
Step 3: For accounts not configured for ITxM, the next and sole step is field mapping. Administrators have the option to determine whether to show the metadata configured in their ClassLinks Roster Server. They must also select the specific fields they wish to display for each defined role.
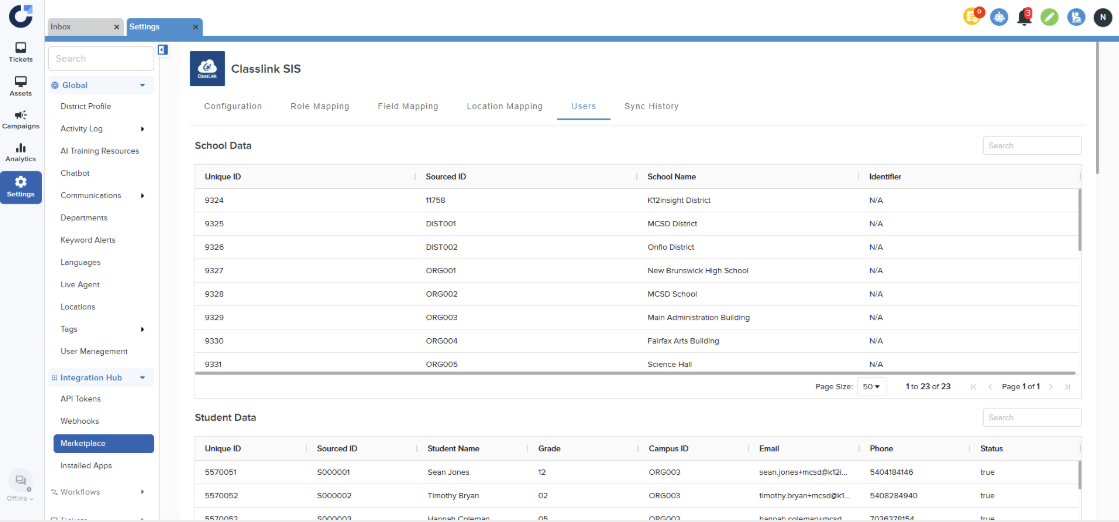
Step 4: Once the Sync is complete, the users will be shown in the Users page.
Step 5: Additional steps for ITxM accounts
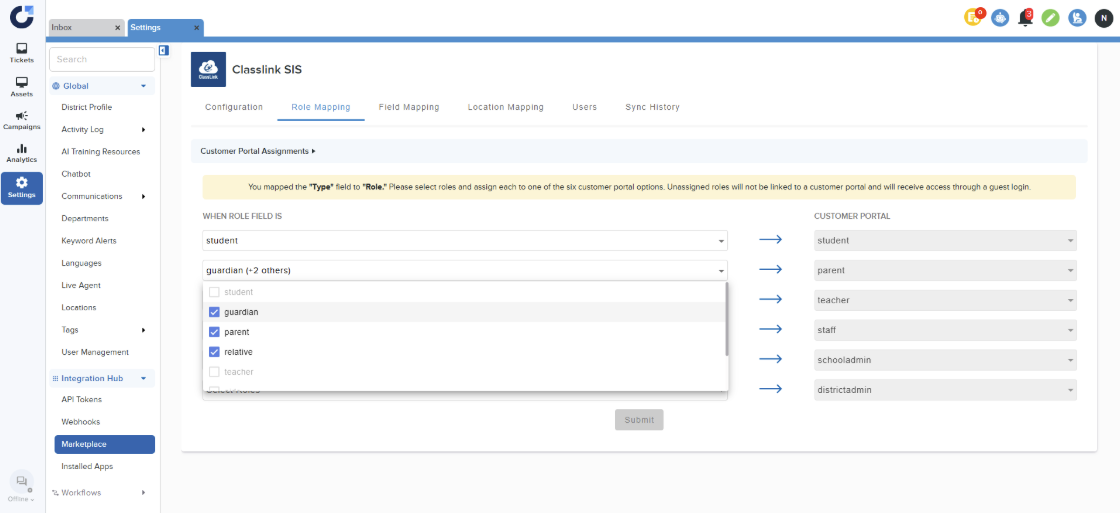
5.1 Role Mapping : Users need to map user roles from their SIS system to the Customer Portal defined in Onflo.
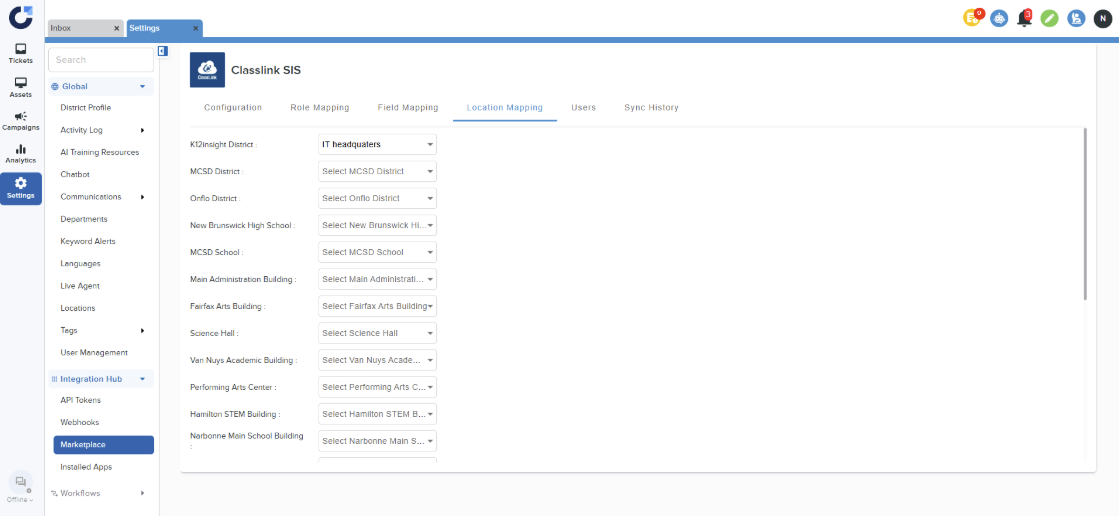
5.2 Once the Admins have added location in their Onflo account they will need to navigate to the Location Mapping page to complete the location mapping.
Note: Districts that are already utilizing ClassLink SIS will find the corresponding card pre-created on their Installed Apps page, and no further action is necessary.